
Cycling bags are defined as much by how they attach to the bicycle as by their capacity. Buyers should identify the mounting location, bicycle or rack type, items to carry, and how quickly the rider needs access. A sample should be checked on the intended setup before a product specification is approved.
Identify the mounting position and bicycle
State whether the bag is intended for a rear rack, handlebar, frame, seat, or another position. Share rack or attachment dimensions, the bicycle type, and any clearance restrictions that matter around wheels, brakes, cables, or rider movement.
The rear-rack pannier reference provides a starting format for a rack-mounted bag discussion. Its product page shows one style; confirm whether its attachment system suits the target bicycle and the project requirements.
Provide a dimensioned drawing or clear photographs of the rack, frame, or mounting area, including attachment spacing and obstructions. Identify the bicycle model or geometry where possible, while still confirming the physical dimensions on the intended setup.
Define contents and access
List the items the rider carries and their dimensions. Decide whether the bag needs a single compartment, small organizer pockets, a closure that can be reached while parked, or a removable carry option. Capacity figures should be paired with the shape and usable opening.
If the bag is removed from the bicycle and carried by hand or shoulder, specify the handle or strap, storage for unused attachment components, and any differences in how the bag should look off the bicycle.
Check clearance with the wheel, spokes, brake, pedals, cables, and rider’s heel through the full movement range. A bag that fits on a static rack can still interfere once loaded or when the bicycle is moving.
Confirm attachment, materials, and visibility
Describe the mounting points, fastening method, adjustment, and the way the bag should be secured. Ask the supplier to review fit and any required reinforcement, then test the sample on the intended rack or bicycle rather than evaluating it only on a table.
Specify the shell, lining, closure, and any visibility features. If weather protection, abrasion performance, or another property is required, define the conditions and test evidence needed. Do not infer a rating from material names or product category.
State the expected contents and load position, then review whether the bag remains stable and whether closures are reachable without compromising safe riding. Agree which load and ride conditions the sample must be checked under.
Make a practical sample checklist
Check attachment, fit, clearance, stability, access, packed contents, carry options, and interference with the bicycle. Review the sample after installation and with the intended load. Record the bicycle or rack used for the check so the results are repeatable.
A complete inquiry includes the bicycle type, mounting location, attachment dimensions, item list, target capacity, materials, branding, market, and quantity. Confirm available options, sample arrangements, order quantities, and timing for the specific style.
If visibility or weather performance is part of the brief, specify the relevant placement, conditions, and evidence. Do not infer road visibility, waterproofness, or universal rack compatibility from a general product photograph.
Buyer questions
Can a pannier fit every rear rack?
Do not assume universal fit. Share the rack and attachment dimensions and verify the sample on the intended setup.
What details should I include in a cycling-bag inquiry?
Include the mounting location, bicycle or rack details, contents, dimensions, attachment needs, materials, quantity, and target market.
Styles mentioned in this guide
These are product references, not a promise of stock or fixed specifications. Open a style page to review its current details.
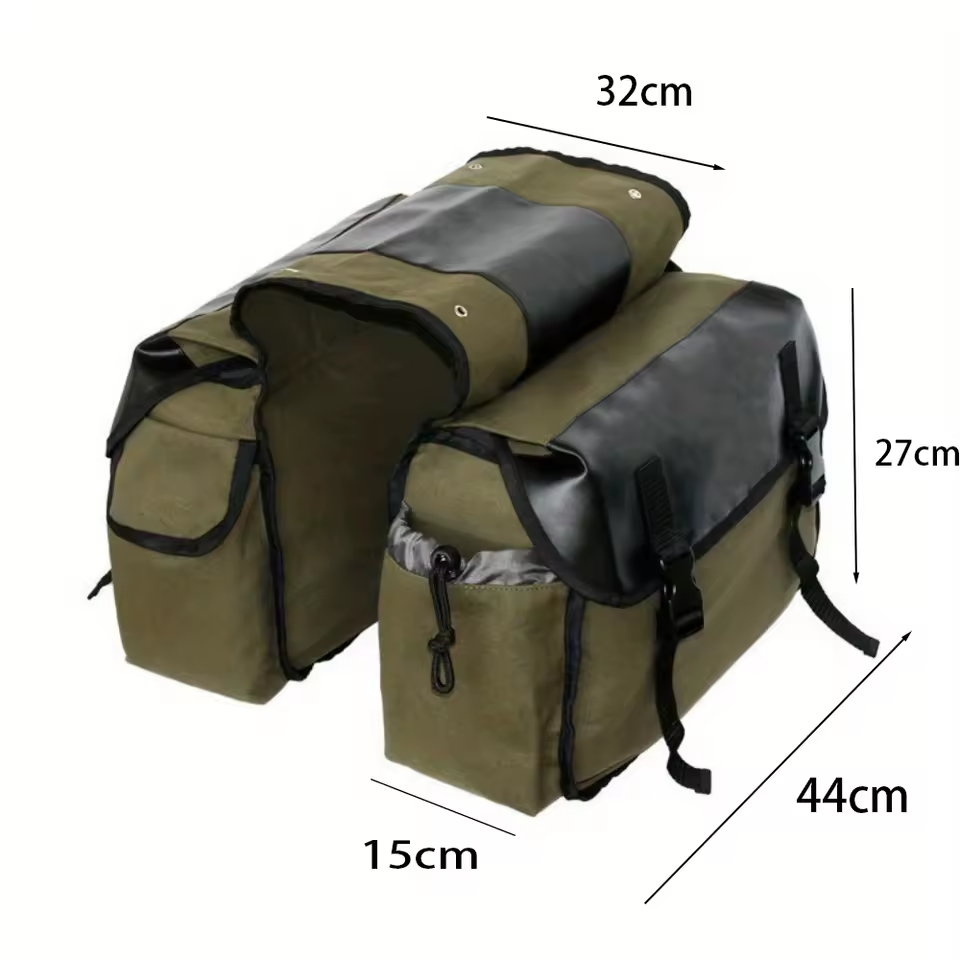
Canvas & Leather Bicycle Rear-Rack Pannier Bag
View product reference →Need help applying this guide to a product?
Send the product reference, intended use, target market, and the details you want to confirm.